
티스토리 뷰
packages.cloud.google.com/apt/doc/apt-key.gpg
Vagrant란?
Vagrant는 운영체제 시스템에 대하여 쉬운 Provisioning을 할 수 있습니다. 주로 가상머신을 생성하고 관리할 때 사용할 수 있습니다.
가상머신을 사용자의 요구에 맞게 Host name, IP, Service Install등 다양한 환경을 미리 설정하고 사용자가 원할 시 해당 시스템을 즉시 사용할 수 있도록 해주는 Provisioning 도구입니다.
[ Vagrant를 사용하지 않은 가상머신 생성 및 관리 방법 ]
VirtaulBox에서 각각의 개별 가상머신을 생성하고 접속하여 한대씩 설정을 해야 합니다.

[ Vagrant를 사용한 가상머신 생성 및 관리 방법 ]
Vagrantfile을 통하여 해당 파일에 가상머신에 대한 설정과 해야할 작업을 미리 정의한 후 VirtualBox를 통하여 Provisioning 할 수 있습니다.
이렇게 Vagrant를 통해 가상머신을 Provisioning 할 경우 가상머신을 간편하게 생성 / 삭제 / 수정 할 수 있습니다.

Vagrant Install
먼저 VirtualBox를 사용하는 운영체제에 맞게 다운로드 후 설치합니다.
- VirtualBox Download URL : https://www.virtualbox.org/wiki/Downloads
그리고 Vagrant를 사용하는 운영체제에 맞게 다운로드 후 설치합니다.
- Vagrant Download URL : https://www.vagrantup.com/downloads.html
특별한 이슈사항이 없다면 설치과정은 어렵지 않기 때문에 따로 포스팅 하지 않겠습니다.
Vagrant 사용방법
Vagrant 기초 명령어
[ vagrant init ]
vagrant를 Provisioning 하기 위한 초기 파일(vagrantfile)을 생성합니다.
[ vagrant up ]
작성된 vagrantfile을 바탕으로 provisioning을 진행합니다.
[vagrant halt ]
vagrant에서 관리하는 가상머신을 종료합니다.
[ vagrant destroy ]
vagrant에서 관리하는 가상머신을 삭제합니다.
[ vagrant ssh ]
vagrant에서 관리하는 가상머신에 ssh로 접속합니다.
[ vagrant provision ]
vagrant에서 관리하는 가상머신의 설정을 변경하고 적용합니다.
VirtualBox와 Vagrant 설치가 완료되었다면 Windows의 터미널 또는 Powershell을 실행하여 Vagrant가 설치된 폴더로 이동합니다.
- Vagrant의 기본 설치경로는 " C:\HasiCorp\ "이며 저는 D 드라이브에 설치하였으므로 " D:\HasiCorp\ " 경로입니다.
|
PS D:\HashiCorp> dir
디렉터리: D:\HashiCorp
Mode LastWriteTime Length Name ---- ------------- ------ ----
d----- 2018-08-08 오전 2:03 Vagrant
PS D:\HashiCorp>
|
|
" vagrant init " 명령어를 입력하여 vagrantfile을 생성합니다.
|
PS D:\HashiCorp> vagrant init
A `Vagrantfile` has been placed in this directory. You are now ready to `vagrant up` your first virtual environment! Please read the comments in the Vagrantfile as well as documentation on `vagrantup.com` for more information on using Vagrant.
PS D:\HashiCorp>
|
|
생성된 " vagrantfile " 을 메모장 또는 기타 텍스트 에디터로 열어줍니다.
- 제가 사용하는 환경은 " Visual Studio Code " 에디터를 사용하므로 해당 에디터로 진행합니다.

텍스트 에디터로 " vagrantfile "을 열었다면 불필요한 주석을 제거합니다.
|
# -*- mode: ruby -*- # vi: set ft=ruby :
# All Vagrant configuration is done below. The "2" in Vagrant.configure # configures the configuration version (we support older styles for # backwards compatibility). Please don't change it unless you know what # you're doing. Vagrant.configure("2") do |config|
config.vm.box = "base"
end
|
|
아래와 같이 " vagrantfile "의 내용을 작성합니다.
- " config.vm.box = [ Box Name ] "은 Vagrant cloud에서 제공하는 가상머신 OS의 이미지를 다운로드하여 실행합니다.
- 만약 CentOS가 아닌 Ubuntu를 사용하고자 할 경우 Vagrant Cloud에서 Ubuntu 이미지를 검색 후 해당 이미지의 이름을 입력합니다.
- Vagrant Cloud URL : https://app.vagrantup.com/boxes/search
|
# -*- mode: ruby -*- # vi: set ft=ruby :
# All Vagrant configuration is done below. The "2" in Vagrant.configure # configures the configuration version (we support older styles for # backwards compatibility). Please don't change it unless you know what # you're doing. Vagrant.configure("2") do |config|
config.vm.box = "centos/7" # 가상머신의 Base 이미지를 선택 config.vm.synced_folder ".", "/vagrant", disabled: true # 가상머신과 Host간의 공유디렉토리를 사용하지 않음
end
|
|
vagrantfile 작성이 완료되었다면 다시 터미널 또는 Powershell 창에서 Vagrant Plugin을 설치합니다.
- Vagrant Plugin 설치를 해야 하는 이유는 Vagrant를 통해 Provisioning 하는 가상머신들의 모든 기능을 사용하기 위해 설치합니다.
- " vagrant plugin install vagrant-vbguest "
|
PS D:\HashiCorp> vagrant plugin install vagrant-vbguest
Installing the 'vagrant-vbguest' plugin. This can take a few minutes... Fetching: micromachine-2.0.0.gem (100%) Fetching: vagrant-vbguest-0.15.2.gem (100%) Installed the plugin 'vagrant-vbguest (0.15.2)'!
PS D:\HashiCorp>
|
|
[ 가상머신 생성 ]
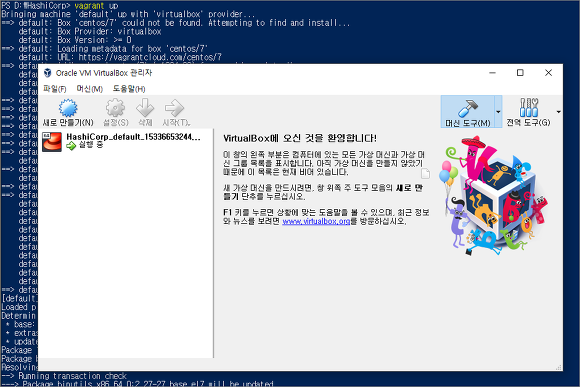
Vagrant Plugin 설치가 완료되었다면 vagrant up 명령어를 통해 가상머신을 Provisioning 합니다.
- " vagrant up "
- " vagrant up " 명령어를 실행하면 vagrantfile의 내용을 읽은 후 해당 내용으로 VirtualBox에 가상머신을 생성합니다.
가상머신 생성이 완료되었다면 " vagrant ssh " 명령어를 통해 생성된 가상머신에 접속할 수 있습니다.
|
PS D:\HashiCorp> vagrant ssh
[vagrant@localhost ~]$ [vagrant@localhost ~]$ [vagrant@localhost ~]$ [vagrant@localhost ~]$ hostname localhost.localdomain
[vagrant@localhost ~]$ ip addr 1: lo: <LOOPBACK,UP,LOWER_UP> mtu 65536 qdisc noqueue state UNKNOWN group default qlen 1000 link/loopback 00:00:00:00:00:00 brd 00:00:00:00:00:00 inet 127.0.0.1/8 scope host lo valid_lft forever preferred_lft forever inet6 ::1/128 scope host valid_lft forever preferred_lft forever 2: eth0: <BROADCAST,MULTICAST,UP,LOWER_UP> mtu 1500 qdisc pfifo_fast state UP group default qlen 1000 link/ether 52:54:00:c9:c7:04 brd ff:ff:ff:ff:ff:ff inet 10.0.2.15/24 brd 10.0.2.255 scope global noprefixroute dynamic eth0 valid_lft 86133sec preferred_lft 86133sec inet6 fe80::5054:ff:fec9:c704/64 scope link valid_lft forever preferred_lft forever [vagrant@localhost ~]$
|
|
[ 가상머신 삭제 ]
가상머신을 삭제하고자 한다면 " vagrant destroy " 명령어를 통해 가상머신을 삭제할 수 있습니다.

'3. 쿠버네티스의 모든것' 카테고리의 다른 글
| Kubespray 다운로드 및 설치 (0) | 2022.05.04 |
|---|---|
| 3탄!! Kubernetes 구성도 알아보자! (0) | 2020.08.05 |
| 윈도우 10에 도커, 쿠버네티스 설치 (도커 데스크탑) (0) | 2020.07.11 |
| 쿠버네티스 디플로이먼트 (0) | 2020.07.11 |
| 쿠버네티스 가상스토리지(Ceph) 설치 (0) | 2020.07.10 |
- Total
- Today
- Yesterday
- directory copy 후 startup 에러
- 쿠버네티스
- Oracle
- 오라클
- [오라클 튜닝] sql 튜닝
- 설치하기(HP-UX)
- 커널
- ORACLE 트러블 슈팅(성능 고도화 원리와 해법!)
- 스토리지 클레스
- startup 에러
- CVE 취약점 점검
- K8s
- 오라클 트러블 슈팅(성능 고도화 원리와 해법!)
- 테라폼
- 트리이스
- 여러서버 컨트롤
- 버쳐박스
- 5.4.0.1072
- MSA
- pod 상태
- 튜닝
- 오라클 홈디렉토리 copy 후 startup 에러
- [오라클 튜닝] instance 튜닝2
- 오라클 인스턴트클라이언트(InstantClient) 설치하기(HP-UX)
- 코로나19
- 앤시블
- 키알리
- ubuntu
- 우분투
- (InstantClient) 설치하기(HP-UX)
| 일 | 월 | 화 | 수 | 목 | 금 | 토 |
|---|---|---|---|---|---|---|
| 1 | 2 | 3 | ||||
| 4 | 5 | 6 | 7 | 8 | 9 | 10 |
| 11 | 12 | 13 | 14 | 15 | 16 | 17 |
| 18 | 19 | 20 | 21 | 22 | 23 | 24 |
| 25 | 26 | 27 | 28 | 29 | 30 | 31 |