
티스토리 뷰
s2024.06.03 - [분류 전체보기] - Kubeflow Central 1탄(개념공부)
2024.06.03 - [분류 전체보기] - Kubeflow Central 2탄(설치)
2024.06.07 - [분류 전체보기] - Kubeflow Central 3탄(설치)
1. 개요!
시작하기전 주의사항!!
우선 CPU Master 는 8core , worknode중 한대는 8core 하시길 바랍니다.
최소 메모리는 32G 로 사용하고 총 8G(최대) , 4G(최소) 하시길 바랍니다.
Mysql 오류가 발생할수 있으니 반드시 PV 잘 미리 체크생성하시길 바랍니다.
NFS 서버 생성하고 PVC PV 잘 이용하시길바랍니다.
이상
https://www.youtube.com/watch?v=eUX9edNwYao
2. 상세 설명 설치 Github
Kubeflow
Kubeflow is an open, community driven project to make it easy to deploy and manage an ML stack on Kubernetes - Kubeflow
github.com

3. Kubeflow 설치
이전까지는 쿠버네티스를 설치하고 클러스터를 구성해 보았다. 이제는 kubeflow를 설치하기 위한 세팅과 kubeflow manifests를 이용해서 설치를 한다.
4. kubeflow를 설치하기 이전 필요한 것
2-1. kustomize 설치

yum install wget -y
wget https://github.com/kubernetes-sigs/kustomize/releases/download/kustomize%2Fv5.4.2/kustomize_v5.4.2_linux_amd64.tar.gz
tar -zxvf kustomize_v5.4.2_linux_amd64.tar.gz

cp kustomize /usr/local/bin/

vi /etc/profile
export PATH=$PATH:/usr/local/bin/
 source /etc/profile

[root@m-k8s data]# kustomize version
v5.4.2


압축 풀고 PATH 까지 지정해줍니다.

sudo chmod 777 /usr/bin/kustomize 권한주고.. Version 체크해주면 우선 1단계 통과!

kubeflow를 설치하기 위해서 우선 가장 중요한것은 현재 k8s 버전에 호환되는 kubeflow 버전을 설치하거나 특정 kubeflow 버전을 설치하고 싶으면 k8s을 맞추는 것이다.
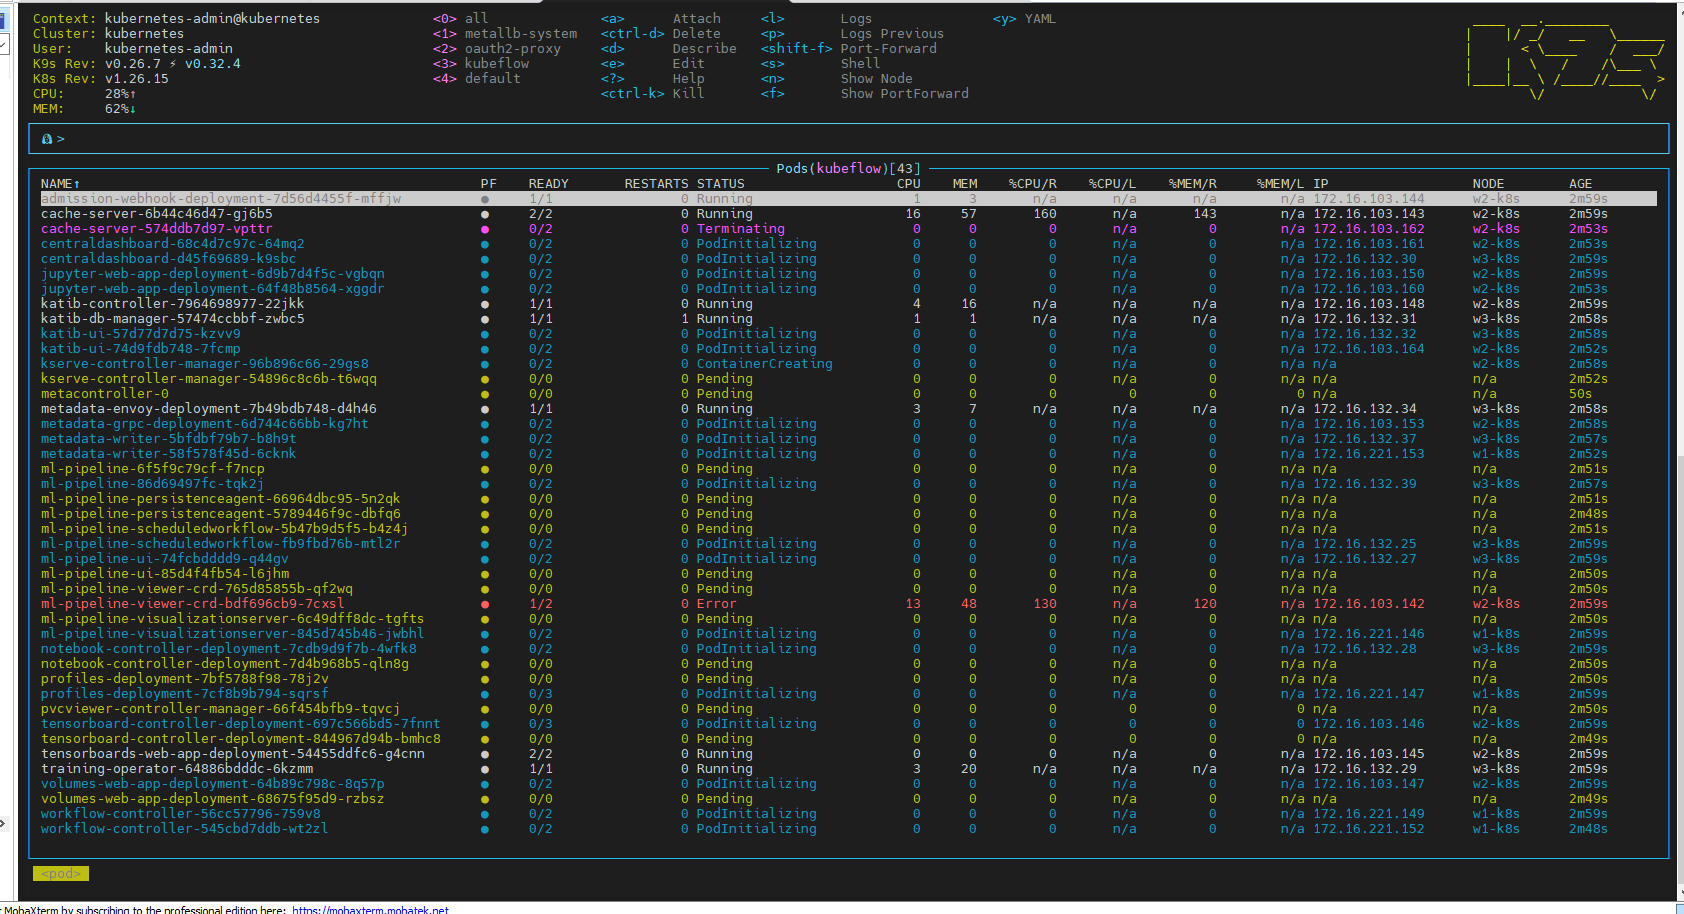
5. k9s 설치
# K9S 설치
K9S_VERSION=v0.26.7
curl -sL https://github.com/derailed/k9s/releases/download/${K9S_VERSION}/k9s_Linux_x86_64.tar.gz | sudo tar xfz - -C /usr/local/bin k9s
kubens 설치하기 : https://tommypagy.tistory.com/665
6. 버전 종속성
kubeflow 1.6 버전을 설치하기 위해 필요한 dependency는 아래 링크에 확인하면 된다.
https://www.kubeflow.org/docs/releases/kubeflow-1.6/#dependency-versions-manifests
7. default storageclass
storageclass 는 쿠버네티스가 퍼시스턴트 볼륨을 동적으로 만들수 있게 사용가능한 스토리지를 정의한 리소스이다.
예를 들어 ceph 파일시스템이 존재하고 여기에 쿠버네티스가 사용할 수 있는 볼륨을 만들기위해 정보를 스토리지클래스로 저장한다.
저장된 정보에 의해서 외부 프로바이더가 ceph 파일시스템을 연결시켜서 쿠버네티스에서 사용할 수 있게된다.
여기서는 쉽게 구현 가능한 nfs 로 실습한다.
8. nfs 설치 (nfs 서버가 설치될 곳)
centos
# 설치 패키지 확인
$ rpm -qa | grep nfs-utils

# nfs 설치
$ yum install nfs-utils

우분투
#sudo apt-get install nfs-kernel-server
9. nfs server 설정 (nfs 서버가 설치될 곳)
# mount -t nfs 192.168.29.14:/mnt /mnt
sudo vi /etc/exports
/datafolder 192.168.0.0/16(rw,sync,no_subtree_check,no_root_squash)
첫번째는 exports 파일에 위와 같이 작성하면되는대 먼저 서버 폴더를 지정해주는대 일반적으로 디스크를
마운트한 폴더로 지정하면 된다. ex) /mnt/
두번째로는 nfs 서버가 허용하는 IP를 설정해야되는대 만약 내 아이피가 192.168.29.0/24으로 시작하면 위와같이
작성해주면 된다.
exportfs -a10. nfs provider 설치
git clone https://github.com/kubernetes-sigs/nfs-subdir-external-provisioner.git
cd nfs-subdir-external-provisioner/deploy
kubectl create -f rbac.yaml
vi deployment.yaml
예제!)
env:
  - name: PROVISIONER_NAME
    value: k8s-sigs.io/nfs-subdir-external-provisioner
  - name: NFS_SERVER
    value: NFS SERVER IP
  - name: NFS_PATH
    value: NFS 데이터 폴더 경로
*********************************************
변경전 As is 환경
...
..
            - name: NFS_SERVER
              value: 10.3.243.101
            - name: NFS_PATH
              value: /ifs/kubernetes
      volumes:
        - name: nfs-client-root
          nfs:
            server: 10.3.243.101
            path: /ifs/kubernetes
***********************************
변경전 As is 환경
...
..
            - name: NFS_SERVER
              value: 192.168.29.14
            - name: NFS_PATH
              value: /mnt
      volumes:
        - name: nfs-client-root
          nfs:
            server: 192.168.29.14
            path: /mnt
#kubectl apply -f deployment.yaml 파일을 열어서 deploy apply 하기 전에
파일 내용의 NFS IP 를 수정후 배포해야합니다.
kubectl apply -f deployment.yaml
kubectl apply -f class.yaml
kubectl patch storageclass nfs-client -p '{"metadata": {"annotations":{"storageclass.kubernetes.io/is-default-class":"true"}}}'
11. 예고편! (3탄 진행)
mysql pv 오류가 발생한다면. 아래 경로로 이동하여 3탄에 있는 PV 를 생성해서 진행해보세요
2024.06.07 - [분류 전체보기] - Kubeflow Central 3탄(설치)
Kubeflow Central 3탄(설치)
2024.06.03 - [분류 전체보기] - Kubeflow Central 1탄(개념공부)2024.06.03 - [분류 전체보기] - Kubeflow Central 2탄(설치)2024.06.07 - [분류 전체보기] - Kubeflow Central 3탄(설치) 참조 : https://mkbahk.medium.com/ubuntu-18-04%EC
tommypagy.tistory.com
12. 디스크 용량이 충분할 것을 /mnt에 마운팅해서 PV를 5개 생성
먼저디렉토리를 생성합니다.
$vi pv.yaml
apiVersion: v1
kind: PersistentVolume
metadata:
  name: pv-volume1
  labels:
    type: local
spec:
  storageClassName: nfs-client
  capacity:
    storage: 30Gi
  accessModes:
    - ReadWriteOnce
  hostPath:
    path: "/mnt/pv1"
---
apiVersion: v1
kind: PersistentVolume
metadata:
  name: pv-volume2
  labels:
    type: local
spec:
  storageClassName: nfs-client
  capacity:
    storage: 30Gi
  accessModes:
    - ReadWriteOnce
  hostPath:
    path: "/mnt/pv2"
---
apiVersion: v1
kind: PersistentVolume
metadata:
  name: pv-volume3
  labels:
    type: local
spec:
  storageClassName: nfs-client
  capacity:
    storage: 30Gi
  accessModes:
    - ReadWriteOnce
  hostPath:
    path: "/mnt/pv3"
---
apiVersion: v1
kind: PersistentVolume
metadata:
  name: pv-volume4
  labels:
    type: local
spec:
  storageClassName: nfs-client
  capacity:
    storage: 30Gi
  accessModes:
    - ReadWriteOnce
  hostPath:
    path: "/mnt/p4v"
---
apiVersion: v1
kind: PersistentVolume
metadata:
  name: pv-volume5
  labels:
    type: local
spec:
  storageClassName: nfs-client
  capacity:
    storage: 30Gi
  accessModes:
    - ReadWriteOnce
  hostPath:
    path: "/mnt/pv5"
$sudo mkdir /mnt/pv{1..5}
$ k create -f pv.yaml
| [root@m-k8s deploy]# k create -f pv.yaml persistentvolume/pv-volume1 created persistentvolume/pv-volume2 created persistentvolume/pv-volume3 created persistentvolume/pv-volume4 created persistentvolume/pv-volume5 created |
vi pv.yaml
여기서 NFS 서버 설치후 작업 하려면 스토리지 클레스 네임을 nfs-client 용으로 변경해줘야 합니다.
13. 아래 PV 경로를 만들어 주면 편합니다. ^^
[root@m-k8s base]# pwd
/data/manifests/apps/pipeline/upstream/third-party/mysql/base

watch -n 5 kubectl get pods — all-namespaces

Every 1.0s: kubectl get pods — all-namespaces GC8440_106–246–237–171: Sat Oct 3 20:58:04 2020

NAMESPACE NAME READY STATUS RESTARTS AGE
cert-manager cert-manager-5d849b9888-dbgx4 1/1 Running 1 98m
cert-manager cert-manager-cainjector-dccb4d7f-z46gb 1/1 Running 1 98m
istio-system istio-tracing-555cf644d-srlwc 1/1 Running 1 98m9fl7n 1/1 Running 1 95m
... 중략
kubeflow tensorboard-5f685f9d79-lmcwf 1/1 Running 1 95m
kubeflow tf-job-operator-5fb85c5fb7-qnmfj 1/1 Running 1 95m
kubeflow workflow-controller-689d6c8846-wz8jh 1/1 Running 1 95m

모든 kubernetes, kubeflow 관련 서비스들이 running 또는 completed 상태이어야 합니다.

[관리용 DASHBOARD접속하기] / istio-ingressgateway nodeport 변환
아래 명령을 수행하여 istio-ingressgateway를 접속포트 80:31380/TCP,443:31390/TCP 를 확인합니다.
31380이 외부에서 공인IP로 접속할 포트입니다.
14 . kubeflow 설치
#1.8버전안됨!!
#git clone https://github.com/kubeflow/manifests88888.git


#1.7로 테스트 합니다. 아래를 선택하세요!
wget https://github.com/kubeflow/manifests/archive/refs/tags/v1.7.0.tar.gz
tar -zxvf v1.7.0.tar.gz
cd manifests-1.7.0
while ! kustomize build example | kubectl apply -f -; do echo "Retrying to apply resources"; sleep 10; done

* 중요함!!!
kustomize build common/cert-manager/cert-manager/base | kubectl apply -f -
kubectl wait --for=condition=ready pod -l 'app in (cert-manager,webhook)' --timeout=180s -n cert-manager
kustomize build common/cert-manager/kubeflow-issuer/base | kubectl apply -f -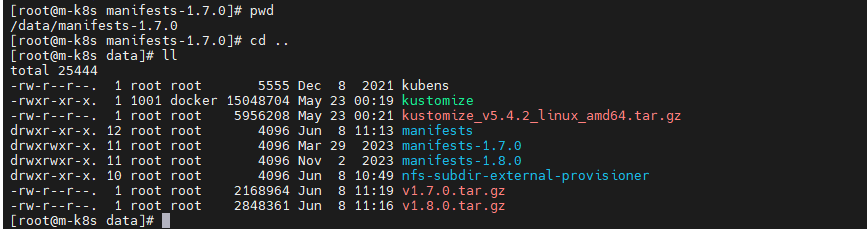
15 . 설치후 접속 테스트
MetalLB 사용
Kubeflow Dashboard
먼저 kubeflow의 Dashboard 를 제공하는 istio-system 네임스페이스의 istio-ingressgateway 서비스의 타입을 LoadBalancer로 변경하여 MetalLB로부터 로드 벨런싱 기능을 제공받기 전에, 현재 상태를 확인합니다.
[root@m-k8s apps]# kubectl get svc/istio-ingressgateway -n istio-system
NAME                   TYPE        CLUSTER-IP      EXTERNAL-IP   PORT(S)                    AGE
istio-ingressgateway   ClusterIP   10.101.23.224   <none>        15021/TCP,80/TCP,443/TCP   3d17h
[root@m-k8s apps]#
해당 서비스의 타입은 ClusterIP이며, External-IP 값은 none 인 것을 확인할 수 있습니다.
type 을 LoadBalancer 로 변경하고 원하는 IP 주소를 입력하고 싶은 경우 loadBalancerIP 항목을 추가합니다.
추가 하지 않을 경우에는 위에서 설정한 IP 주소풀에서 순차적으로 IP 주소가 배정됩니다.
kubectl edit svc/istio-ingressgateway -n istio-system# kubeflow 내부 Gateway에
# Certificate 적용
kubectl edit gateway kubeflow-gateway -n kubeflow
---
apiVersion: networking.istio.io/v1alpha3
kind: Gateway
metadata:
name: kubeflow-gateway
namespace: kubeflow
spec:
selector:
istio: ingressgateway
servers:
- hosts:
- "*"
port:
name: http
number: 80
protocol: HTTP
# 여기 아래부분 추가
tls:
httpsRedirect: true # 지금은 sdk tls관련 오류로 인하여 false로 작업중. 추후 수정예정
- hosts:
- "*"
port:
name: https
number: 443
protocol: HTTPS
tls:
mode: SIMPLE
credentialName: kubeflow-ingressgateway-certsspec:
clusterIP: 10.103.72.5
clusterIPs:
- 10.103.72.5
ipFamilies:
- IPv4
ipFamilyPolicy: SingleStack
ports:
- name: status-port
port: 15021
protocol: TCP
targetPort: 15021
- name: http2
port: 80
protocol: TCP
targetPort: 8080
- name: https
port: 443
protocol: TCP
targetPort: 8443
- name: tcp
port: 31400
protocol: TCP
targetPort: 31400
- name: tls
port: 15443
protocol: TCP
targetPort: 15443
selector:
app: istio-ingressgateway
istio: ingressgateway
sessionAffinity: None
type: LoadBalancer
loadBalancerIP: 192.168.29.100
status:
loadBalancer: {}다시 확인을 해보면 External-IP 값이 192.168.29.100 인 것을 확인합니다.
AS IS

TO BE

[root@m-k8s apps]# kubectl get svc/istio-ingressgateway -n istio-system
NAME                   TYPE           CLUSTER-IP      EXTERNAL-IP     PORT(S)                                      AGE
istio-ingressgateway   LoadBalancer   10.101.23.224   192.168.29.21   15021:30025/TCP,80:30047/TCP,443:31530/TCP   3d17h
Web Browser 를 열어 http://192.168.29.21 으로 접속하여, 다음과 같은 화면이 출력되는 것을 확인합니다.
kubectl get service -n istio-system istio-ingressgateway[root@m-k8s apps]# kubectl get svc/istio-ingressgateway -n istio-system
NAME TYPE CLUSTER-IP EXTERNAL-IP PORT(S) AGE
istio-ingressgateway LoadBalancer 10.101.23.224 192.168.29.21 15021:30025/TCP,80:30047/TCP,443:31530/TCP 3d17h
http://192.168.29.21/dex/auth/local/login?back=&state=f4awhzu3ubcanlsgh4hytb3df
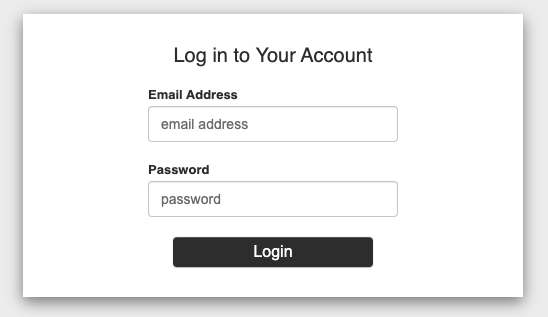
위와 같이 dex 로그인 페이지가 뜨는대 default 계정이 user@example.com / 12341234 이다.
16 런치 버튼 클릭시 아래 이슈 확인
(아래와 같이 403 오류가 발생할경우 대처법 쥬피터 pod 의 edit 들어가서 수정하면 됩니다.)


16-1. k9s 에서 아래 빨간 부분을 찾습니다.

16-1. edit 눌러서 false 로 변경
spec:
  containers:
  - env:
    - name: APP_PREFIX
      value: /jupyter
    - name: UI
      value: default
    - name: USERID_HEADER
      value: kubeflow-userid
    - name: USERID_PREFIX
    - name: APP_SECURE_COOKIES
      value: "false"
    image: docker.io/kubeflownotebookswg/jupyter-web-app:v1.7.0
    imagePullPolicy: IfNotPresent
    name: jupyter-web-app
    ports:
    - containerPort: 5000
      protocol: TCP
    resources: {}
    terminationMessagePath: /dev/termination-log
    terminationMessagePolicy: File
    volumeMounts:
dex 를 재기동하고 다시 연동해봅니다.

메모
꼭 HTTP를 통해 Kubeflow를 노출해야 하는 경우 모든 관련 웹 앱에서 환경 변수를 로 Secure Cookies설정하여 기능을 비활성화할 수 있습니다. 이는 보안 위험이 있으므로 권장되지 않습니다.
APP_SECURE_COOKIES false
| NOTE If you absolutely need to expose Kubeflow over HTTP, you can disable the Secure Cookies feature by setting the APP_SECURE_COOKIES environment variable to false in every relevant web app. This is not recommended, as it poses security risks. |
[root@m-k8s manifests-1.7.0]# k get deployments.apps -n kubeflow | grep web
admission-webhook-deployment            1/1     1            1           27m
jupyter-web-app-deployment              1/1     1            1           27m
kserve-models-web-app                   1/1     1            1           27m
tensorboards-web-app-deployment         1/1     1            1           27m
volumes-web-app-deployment              1/1     1            1           27m
[root@m-k8s manifests-1.7.0]#


k edit deployments.apps -n kubeflow jupyter-web-app-deployment
...
    spec:
      containers:
      - env:
        - name: APP_PREFIX
          value: /jupyter
        - name: UI
          value: default
        - name: USERID_HEADER
          value: kubeflow-userid
        - name: USERID_PREFIX
        - name: APP_SECURE_COOKIES
          value: "true"
*************************
k edit deployments.apps -n kubeflow jupyter-web-app-deployment
...
    spec:
      containers:
      - env:
        - name: APP_PREFIX
          value: /jupyter
        - name: APP_SECURE_COOKIES
          value: "false"
        - name: UI
          value: default
        - name: USERID_HEADER
          value: kubeflow-userid
        - name: USERID_PREFIX
        - name: APP_SECURE_COOKIES
          value: "true"
*
- Total
- Today
- Yesterday
- 커널
- 버쳐박스
- 쿠버네티스
- 트리이스
- [오라클 튜닝] sql 튜닝
- 튜닝
- 키알리
- 여러서버 컨트롤
- pod 상태
- 앤시블
- 우분투
- CVE 취약점 점검
- 오라클 트러블 슈팅(성능 고도화 원리와 해법!)
- 테라폼
- directory copy 후 startup 에러
- Oracle
- 스토리지 클레스
- ubuntu
- 오라클 홈디렉토리 copy 후 startup 에러
- (InstantClient) 설치하기(HP-UX)
- MSA
- 코로나19
- 5.4.0.1072
- 오라클 인스턴트클라이언트(InstantClient) 설치하기(HP-UX)
- K8s
- 오라클
- ORACLE 트러블 슈팅(성능 고도화 원리와 해법!)
- [오라클 튜닝] instance 튜닝2
- startup 에러
- 설치하기(HP-UX)
| 일 | 월 | 화 | 수 | 목 | 금 | 토 |
|---|---|---|---|---|---|---|
| 1 | 2 | 3 | 4 | 5 | 6 | 7 |
| 8 | 9 | 10 | 11 | 12 | 13 | 14 |
| 15 | 16 | 17 | 18 | 19 | 20 | 21 |
| 22 | 23 | 24 | 25 | 26 | 27 | 28 |
| 29 | 30 |